 AfterInspect
Severity, condition and marking items inspected
Two different things are recorded in an inspection, and it helps to keep them apart. An item's condition says whether and how you looked at it. A finding's severity says how much a problem matters. An item has one condition and can have any number of findings, each with its own severity.
Set an item's condition
Tap the item's name to open it. The Condition buttons are at the top: Inspected, Not inspected, Not present and Deficient.
Tap one. Tap the same button again to clear it.
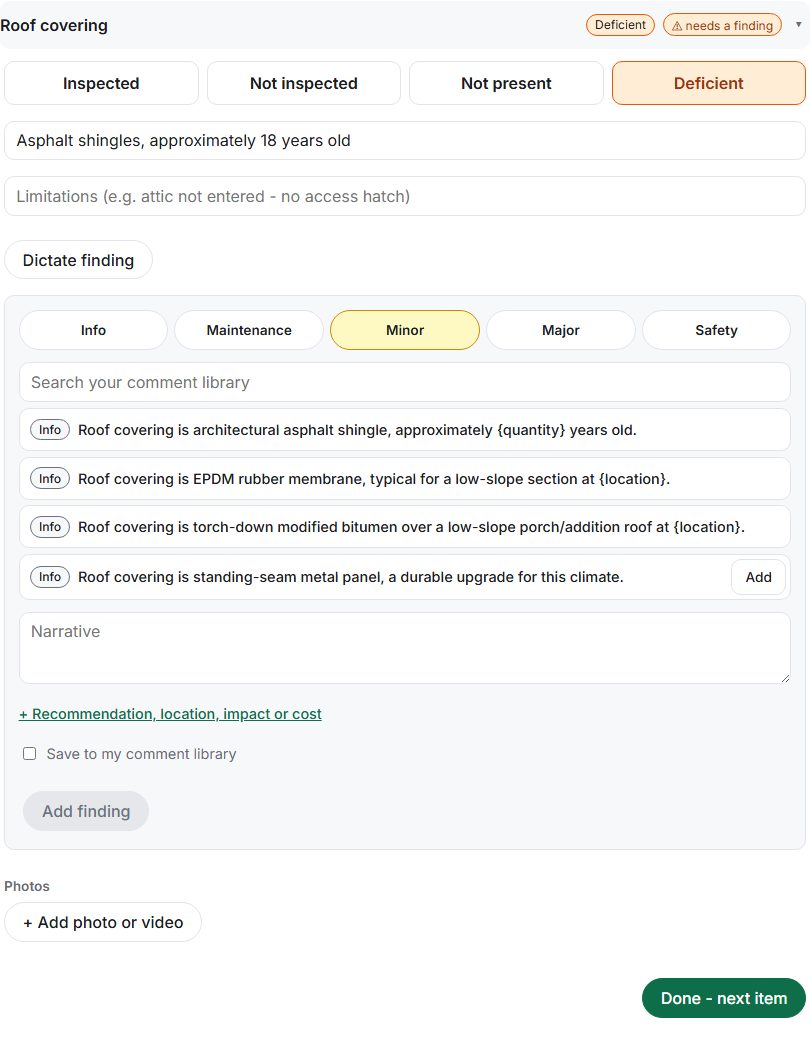
Use Notes for general observations about the item. Use Limitations for what you could not inspect and why, for example "attic not entered - no access hatch". A limitation is reported as a disclosed limitation in the report rather than as an ordinary note.

If you set Deficient and have not written a finding for the item, the row shows "needs a finding" beside the condition. This is a reminder, not a block; you can carry on.

Choose a severity for a finding
In the open item, use the finding form. The Severity buttons are Info, Maintenance, Minor, Major and Safety. A new finding starts at Minor.
Type the Narrative. Tap + Recommendation, location, impact or cost to add a recommendation, a location, "Why it matters", and a rough repair cost band.
Tap Add finding.
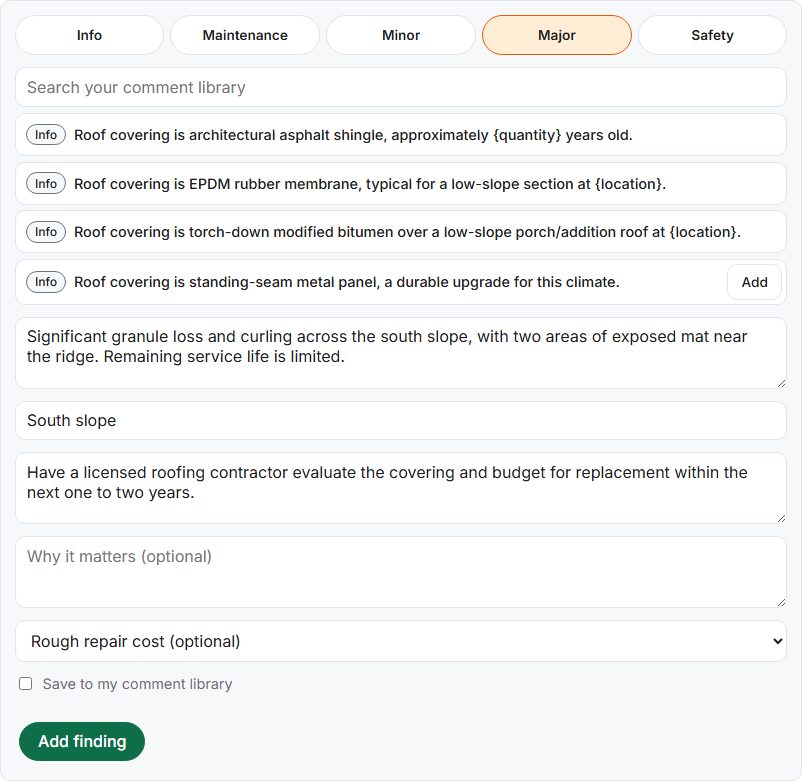

The report explains the five levels to the client in its own legend:
- Safety: a hazard to occupants that should be addressed promptly.
- Major: a significant defect, or one likely to be costly if left unattended.
- Minor: a deficiency that is not urgent but warrants repair.
- Maintenance: routine upkeep that will keep a component in good order.
- Info: an observation provided for the client's information.
Choose the level yourself. Nothing sets severity for you: a dictated finding starts at Minor, and an AI draft only changes it if you tap Apply to finding. See dictate a finding. You can reuse wording and severity from your own comment library, which the finding form searches as you type.
Mark items inspected quickly
An item that has no condition and no findings shows a small tick button on its row. Tapping it sets the condition to Inspected without opening the item.

Items you have marked Inspected, with no findings, no photos and no limitations, are grouped together in the report as being in good order.
Track what is reviewed
An item counts as reviewed once it has a condition or at least one finding. Near the top of the inspection, the progress bar says "N of M items reviewed". Next unreviewed opens the next item that has neither. Done - next item at the bottom of an open item closes it and opens the next one.

Complete the inspection
Tap Complete inspection. The app counts up what is there: how many findings are recorded, how many items are not reviewed yet, and how many items are marked Deficient with no finding describing them.
Tap Yes, complete to finish. Review remaining takes you to the next unreviewed item. Cancel goes back.
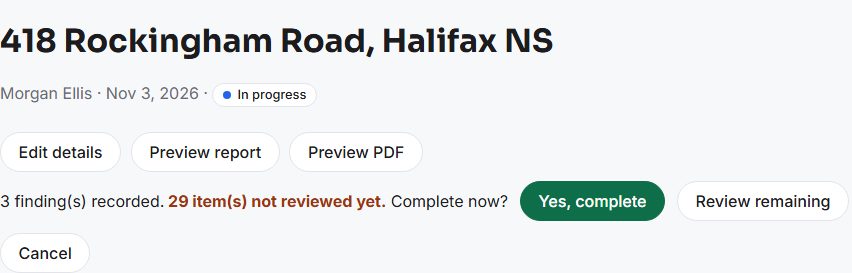

The warnings do not stop you completing. A completed inspection is read-only; Reopen for editing makes it editable again. The report is generated from a completed inspection: see Complete an inspection and generate the report.
If something goes wrong
- You cannot change an item. The inspection is completed, or the account is read-only. Tap Reopen for editing on a completed inspection.
- You deleted a finding by mistake. After Delete, an "Undo" bar appears for a few seconds. Tap Undo before it goes.