 AfterInspect
Re-inspections
A re-inspection is the follow-up visit after repairs: you pick which findings to re-check, record on site whether each one was fixed, and generate a short addendum instead of a second full report. It is a new inspection linked to the original, so everything you know about working in the field, including offline, applies to it.
Before you start
- The original inspection must be Completed. The Start re-inspection button only appears there, and only if the inspection has at least one finding.
- You need a connection to start one. The server reads the original inspection, which your phone may never have held. After it is created you can work offline as usual.
- A re-inspection cannot itself be re-inspected. If a second round is needed, start another one from the original.
Start a re-inspection
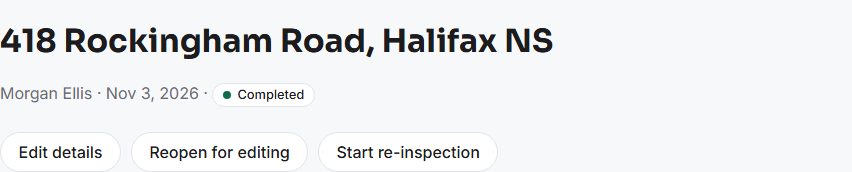
Open the completed inspection and tap Start re-inspection at the top.
The Start a re-inspection box lists every finding with its severity, its section and item, and its wording. Safety and Major findings are already ticked. Tick or untick the others as needed. The box says "The report you already sent is not changed."
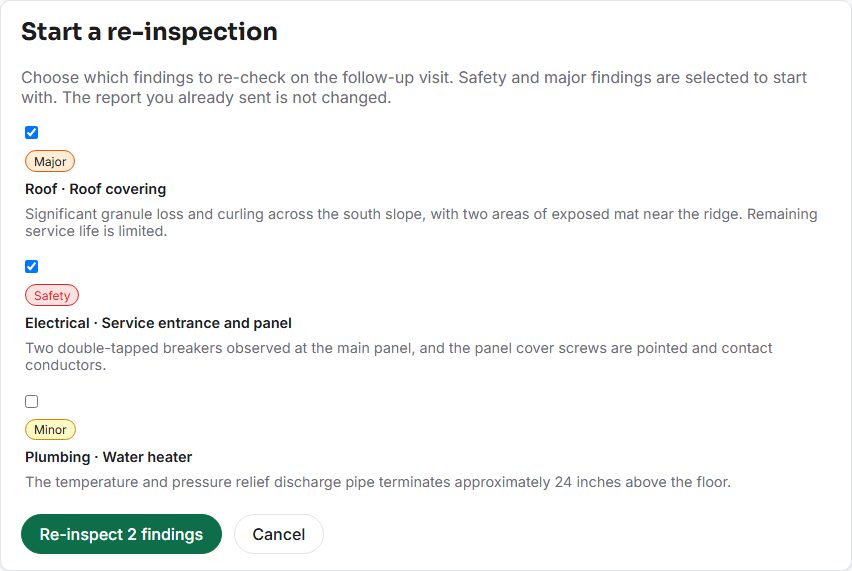
Tap Re-inspect 2 findings (the number matches what you ticked). The button is disabled if nothing is ticked.


You land on the new inspection, headed with the same address and client. A line under the title reads "Re-inspection - re-checking findings from an earlier visit." with an Open the original inspection link.

What is copied, and what is not
- Only the sections and items that carry a ticked finding come across. It is a short visit, not a second walkthrough.
- Each ticked finding is copied with its severity, narrative, recommendation, location, "why it matters" text and repair cost band. The copy is independent: changing it later never touches the original.
- Photos, notes, limitations and condition ratings are not copied.
- The property address, client and agent are copied. The weather and temperature are not, because they belong to the original day. The date is set to today.
- The original inspection and its report are left exactly as they were. The client's old link and PDF do not change.
Record what you find on site
The item still shows its usual controls, including a form to add a new finding if you spot something fresh. Each carried finding is quoted under the label "Reported on the original inspection". It has no Edit button: the wording is what you originally reported, and this visit adds an outcome and a note. Under it are three buttons, Corrected, Not corrected and Not accessible, and a note field. The finding also has a Delete button, which removes the carried finding from this visit; as with any finding, there is a few seconds to undo it.
Tap one outcome. Tapping the same one again clears it, in case of a mis-tap.
Type in the note field. It asks "What you observed (optional)", or "Why it could not be checked" once you choose Not accessible. The note is saved when you tap out of the field.
Add photos to the finding as you normally would, to show what you found now.
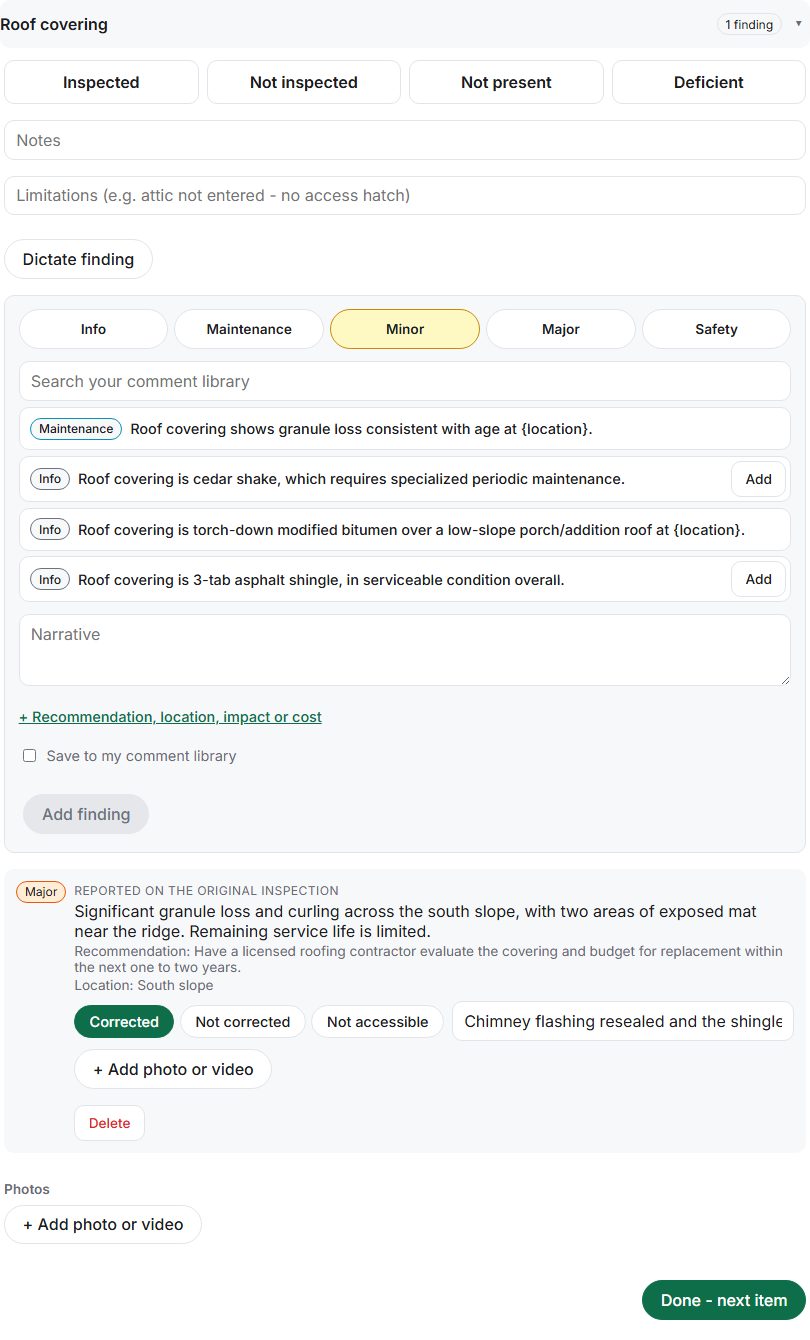
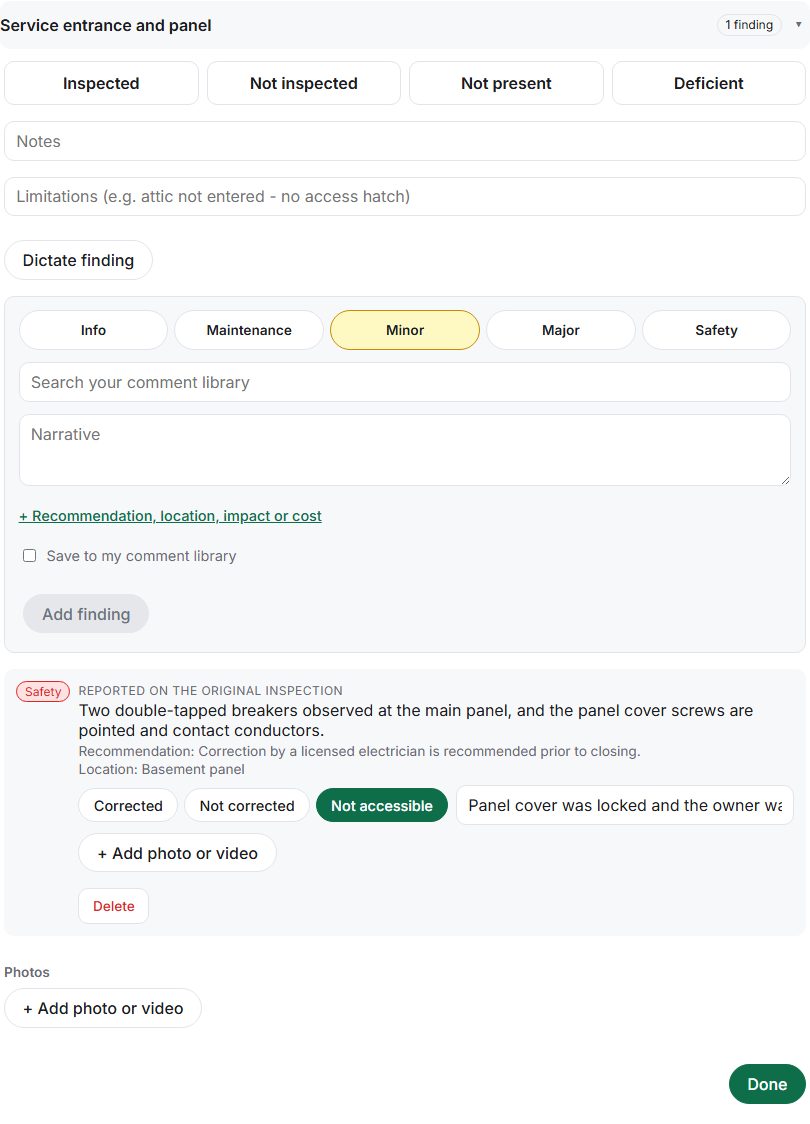


There are three outcomes and no pass or fail on purpose. Not accessible is for something you could not check this time, such as a wall that is closed up again, and the note should say why. A finding you do not mark shows as "Not re-checked" in the addendum.
These changes are saved on the device and sync later, like any other edit.
Complete it and generate the addendum
- Tap Complete inspection and Yes, complete, as in Complete an inspection and generate the report.
- In the Report box, tap Generate report, then Download PDF.
The PDF is a cover page followed by a page headed "Repair re-inspection addendum". It states that the addendum records a follow-up visit to verify repairs reported in the original inspection and covers only the items listed. It gives the original inspection date, the re-inspection date, the property and the inspector, then a count such as "2 items re-inspected: 1 corrected, 0 not corrected, 1 not accessible". Each finding has its severity, section and item, an outcome label, the location, "Reported:" with the original wording, "On re-inspection:" with your note, and up to four photos. It closes with a note that verification is a visual re-check of the specific defect, not a new inspection, and does not warrant future performance.

Notice pages, the About this report page, the table of contents, the summary and the limitations page are all left out of an addendum. See Report pages.
Sending it
Publishing and emailing work the same as for any report: see Share the link and email the client. One difference matters. The web report behind the share link is the ordinary report layout and does not show the outcomes you recorded. The outcomes are only in the PDF, which Email to client attaches. Tell the client to open the PDF.
If something goes wrong
- "Could not start the re-inspection. This one needs a connection - try again once you are back online." Reconnect and tap the button again.
- No Start re-inspection button. The inspection is not Completed, has no findings, or is itself a re-inspection.
- The outcome buttons are read-only chips. The re-inspection is Completed. Tap Reopen for editing.
- The note field lost what you typed. It saves when you leave the field; tap out of it before you leave the page.