 AfterInspect
Report pages
Report pages is where you add pages of your own wording to every report, such as the scope of the inspection or your terms, and choose which optional parts appear. AfterInspect supplies no wording. What you write is exactly what your clients read, so check it with whoever advises you on your agreement.
Only the account owner and admins see this screen. It applies to all of the account's reports.
Add a notice page
Open the menu at the top right, choose Account, then Report pages under Workflow.
Under Notice pages, tap Add a page. A new Page 1 appears.
Type a Title and the Text. Leave a blank line between paragraphs. The text is plain: there is no bold, no lists and no links.
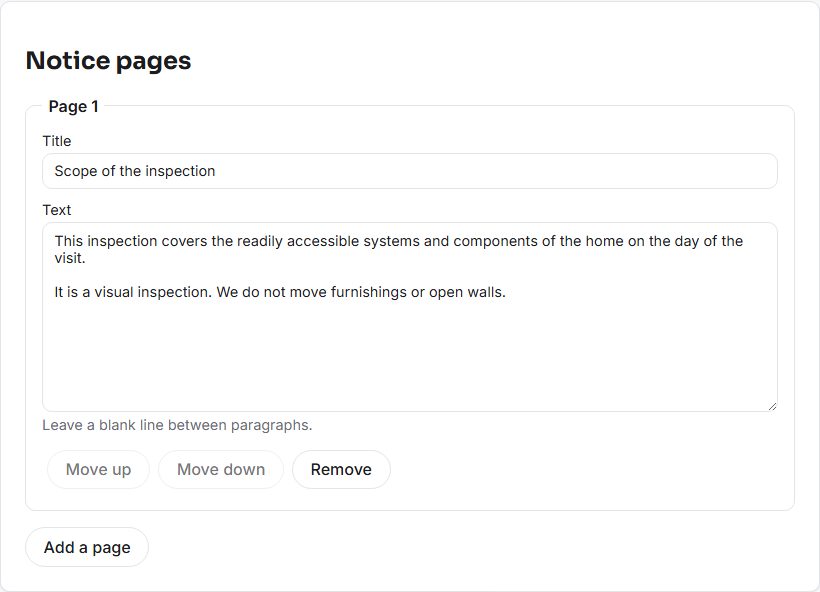
To add more, tap Add a page again. You can have up to twelve. Use Move up and Move down to set the order, and Remove to delete a page.
Scroll down and tap Save. "Saved." confirms it.

The title can be up to 120 characters and the text up to 20,000, and the fields stop you typing past that. The Add a page button is greyed out at twelve pages. If a save is still refused, the screen shows the server's own message: "Each intro page needs a title and some text.", "At most 12 intro pages." or "An intro page is too long." A contact detail that is too long gives "A contact detail is too long."
Add your company contact details
Under Company contact details, fill in any of Phone, Email, Address and Website. When any of them is filled in, it is shown on the report instead of the free-text contact block set in Branding.

In the PDF they appear in the identity block on the About this report page, next to your logo and licence numbers.
Choose what the report includes
Under What the report includes there are five checkboxes.

- Show the notice pages. On by default. Turn it off to keep your pages out of the report without deleting them.
- Show the general information page. Off by default. Adds extra property detail to the report, taken from the General information (optional) card on each inspection's edit page: building type, bedrooms and bathrooms, stories, construction, utilities and the seller's agent. Photos attached there (images only) are included too.
- List the items found in good order. On by default. In the current version this setting is applied to the web report. The PDF always includes its "In good order" box.
- Show phone numbers and emails of the client and agents. Off by default. Controls whether the phone numbers and emails on the general information page are included. Names still show. In the PDF the client's email still appears in the property details whatever this is set to; the note on screen saying it keeps them out of the PDF is not the whole story. Anyone with the link to a web report can read it, so turn this on only if you are comfortable with that.
- Open the notice pages by default on the web report. Off by default. Clients then see each notice page already open instead of tapping to expand it.
Tap Save after changing any of them.
Where the pages show up
In the PDF, your notice pages come right after the cover, one page each, in the order you set. They are followed by the About this report page and the property details. The PDF of a re-inspection is a short document and leaves them out.
In the web report, which clients open from the shared link, the pages are in a section headed Important information, near the top, above the inspection sections. Each page is a collapsible block that opens to its text.

See Your first inspection for how a report is made, Complete an inspection and generate the report for the steps, and Share the link and email the client for how clients open the web report. A re-inspection report is shorter: see Re-inspections. Your logo and colour come from Branding your report.
If something goes wrong
- Your pages are not in the report. Check that Show the notice pages is ticked and that you tapped Save.
- You cannot see Report pages under Account. Only the account owner and admins can.
- The screen says it could not load your report settings. Refresh the page.
- Text runs together. Put a blank line between paragraphs; a single line break stays inside the same paragraph.