 AfterInspect
Pre-inspection agreement
The pre-inspection agreement is your own wording, sent to the client to read and sign before the inspection. They sign by typing their name on a web page, with no account or app. AfterInspect does not write or review the wording, so have your lawyer or association check it.
Before you start
You need to be online to send an agreement or see whether it has been signed. Only the account owner or an admin can change the wording. If you are on a poor connection, see Working offline and fixing sync issues.
Write your wording
Open Account, then Agreement.
In Title, name the agreement. It starts as "Pre-inspection agreement" and can be up to 150 characters.
In Agreement text, paste the agreement you already use. It is plain text and line breaks are kept. The limit is 20,000 characters.
Tap Save. The page says "Saved."
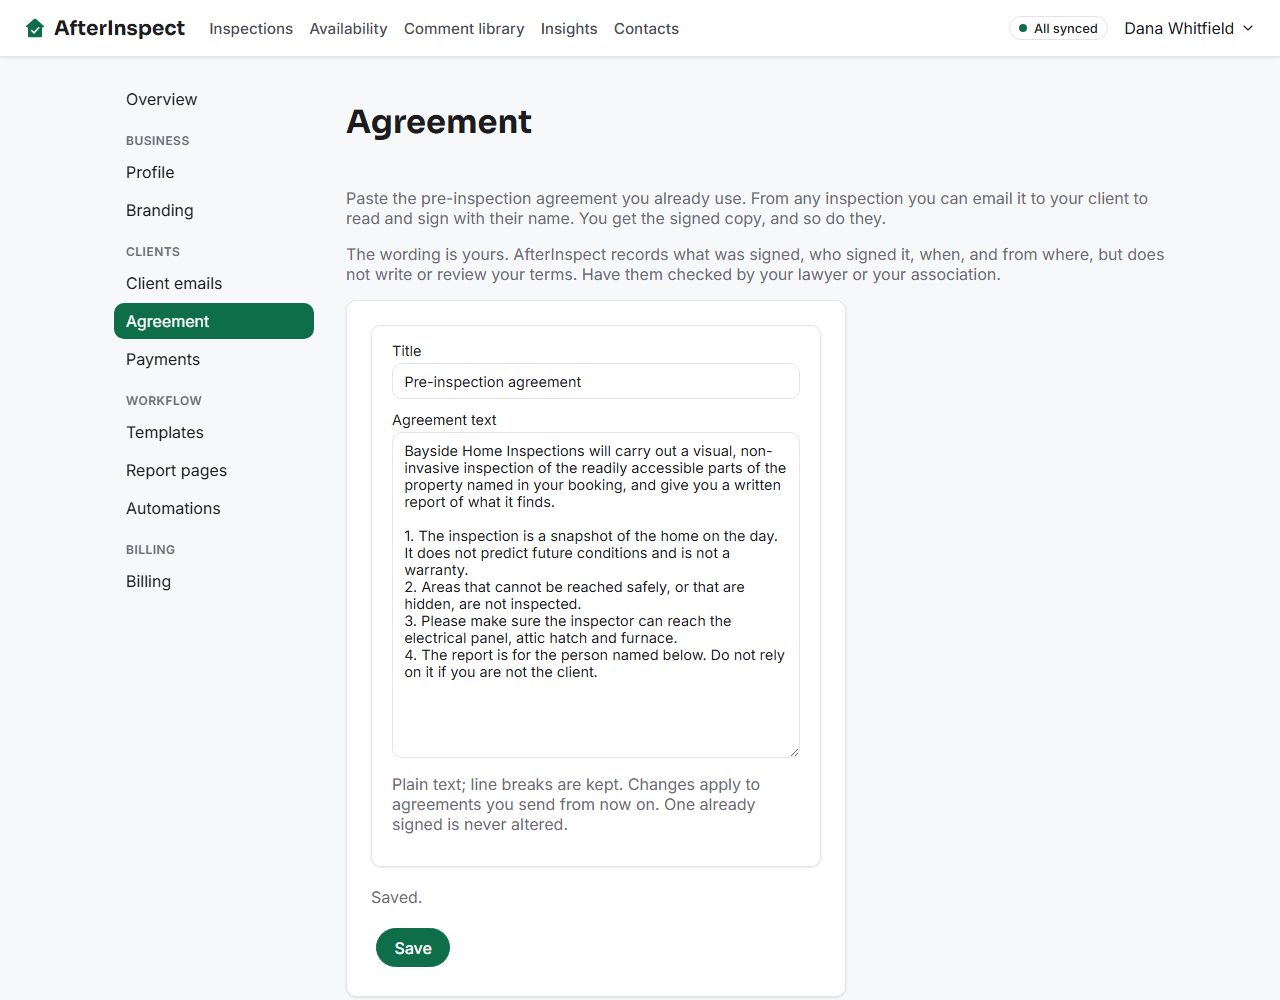

Changes apply to agreements you send from now on. An agreement that has already been signed is never altered. One that was sent but not yet signed takes the new wording the next time you send it, so the client always signs the words they were shown.
Send it for an inspection
Open the inspection and find the Agreement box.
Tap Send agreement. Client email is filled in from the client's email on the inspection; type one if it is empty or wrong.
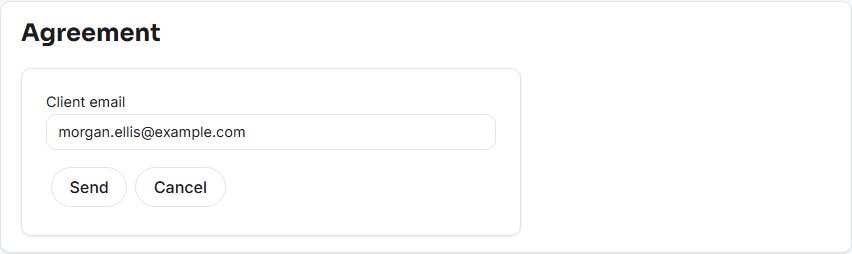
Tap Send. The box now says "Sent to (address) on (date). Waiting for a signature."



The client gets an email from your company name "(via AfterInspect)" with the subject "(agreement title) - (property address)" and a Review and sign button. Replies go to you. If you would rather send the link yourself, tap Copy signing link and paste it into a text or your own email.
If you have not written any wording yet, the box says "Write your wording under Account > Agreement first." and the send is refused.
There is one agreement per inspection. Resend emails it again, to the same address or a different one.
What the client does
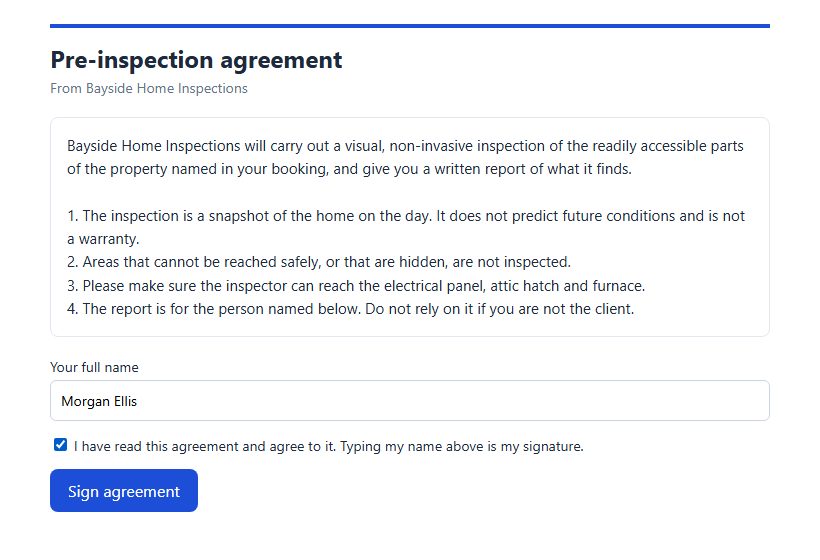
The client opens the link. The page shows your title, "From" and your company name, and your wording.
They type Your full name (at least two characters), tick "I have read this agreement and agree to it. Typing my name above is my signature." and tap Sign agreement.
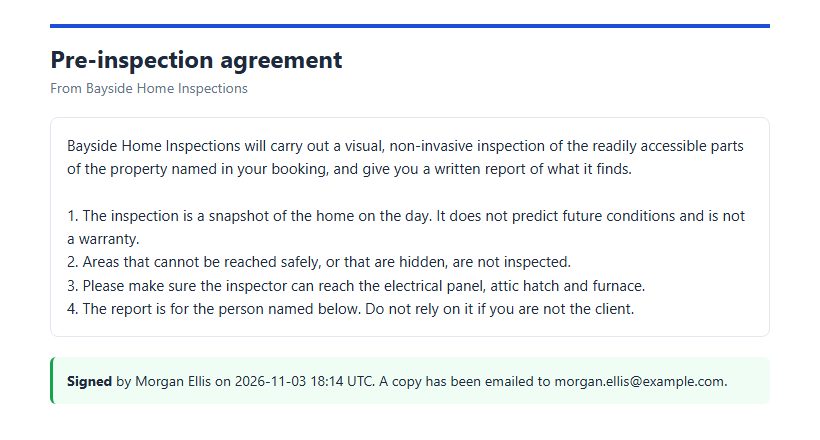
The page now shows "Signed by (name) on (date and time, UTC). A copy has been emailed to (address)."


The client gets an email "Your signed copy" with the full text. You get "Agreement signed" with the address. Both are sent from your company name, and a failed email never undoes the signature.
See that it is signed
Open the inspection. The Agreement box now reads "Signed by (name) on (date)." The Send agreement, Resend and Copy signing link buttons are gone, because a signed agreement cannot be sent again.

AfterInspect keeps the exact text that was signed, the typed name, the time, the IP address and the browser. The app shows you the name and the time.
Other ways it gets sent
- At booking. Under Availability, Limits, tick "Send my agreement to clients when they book". The client then sees a Read and sign your agreement button when they finish booking. See Online booking and availability. The request card for that booking says "Agreement sent, not signed yet" or "Agreement signed" (see Booking requests).
- A reminder. Under Account, Client emails, you can have a client reminded once if they have not signed a day after it was sent. See Client emails and automations.
- To another tool. A signature can be passed to Zapier or your own system. See the same article.
If something goes wrong
- "Write your agreement under Account > Agreement before sending it." Your wording is empty. Write it and save, then send.
- "Enter the client's email address to send the agreement to." The address is empty or not valid.
- "Could not send the agreement. Check your connection and try again." The request did not reach the server. Try again when you are online.
- The client says the page asks them to read it again. You changed the wording while they had the old page open. They reload the link, read the new text and sign.
- "Type your full name and tick the box to sign." The name is under two characters or the box is not ticked.
- The client cannot find the email. Check their spam folder, or tap Copy signing link and send it another way.
- The signing link says it is not available. The link may have been copied wrongly. Copy it again from the Agreement box.